Electa Live Screen recorder is a simple tool to create movies and presentations by recording your screen activities and live sessions. The Electa Live Screen Recorder is not a replacement of the Eecta Live session recorder which is available in the virtual room. You can use either or both at the same time.
The Free Screen Recorder is a free tool which is still in a beta test
phase. It is not guaranteed to work on all systems and may cause some
issues. We cannot guarantee that the tool will work exactly as expected.
If you need to record your Electa Live sessions please use our built-in
virtual classroom recorder available in your Electa Live classroom.
Starting the Screen Recorder
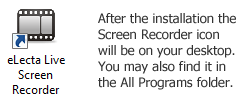
After the installation is complete the screen recorder icon could be found on your desktop or through the All Programs folder under the Windows Start button.
The Main Toolbar
The Screen Recorder main window looks like this. All actions are initiated from the main window.
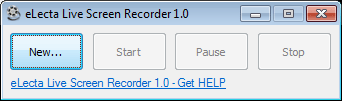
The New button brings up the Movie Properties window.
The Start button starts the recorder.
The Pause button pauses the recording.
The Stop button finalizes the recording.
Preparing a New Recording
Click the "New" button to bring up the Movie Properties window where you specify what you will be recording.
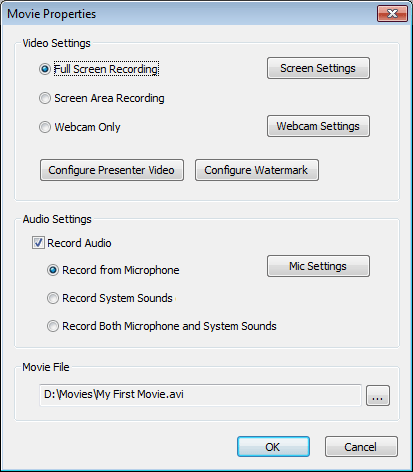
Full Screen Recording will cause the recorder to capture your entire screen. Screen Area Recording is used for capturing just a part of your screen. After choosing this you will be given option to select the screen area by dragging the mouse over your desktop. Webcam Only will record only video from your webcam. The webcam settings and the dimensions of the video window can be controlled from the Web Cam Settings button.
To record both screen and webcam check out the Presenter Video option.
You can use two different audio sources for your screen recording. Record from Microphone will only use the microphone as an audio source. No other sound but only those captured by the microphone will be included in the movie.Record System Sound will only include sounds that are played from the speakers. The microphone input will be discarded. Record Both Microphone and System Sound will include both the input from your microphone and the sound played out by your speakers.
Specify Your Movie File Location
The Movie File box points to the location of your screen recording. You may choose a file name by pressing the small button ... .
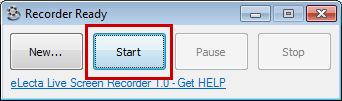
Click OK to prepare the new recording. The recorder is now ready to do the actual recording. After you are ready click the "Start" button.
Starting the Capture
Now you are ready to start your actual recording. To do so click the Start button on the recorder toolbar.
A 5 second countdown is started before the actual recording begins.
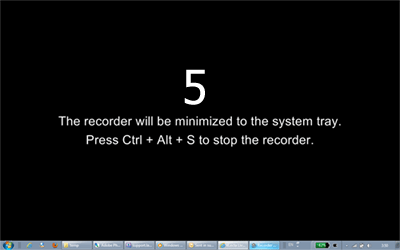
The recorder goes minimized to the system tray and the actual recording of screen activities begins. You can pause or stop the recording by right clicking on the tray icon or using the keyboard shortcuts.

You can bring back the recorder toolbar by clicking the recorder tray icon.
Keyboard Shortcuts
The following shortcut keys are available to control the process without bringing up the recorder window.
Ctrl + Alt + S - Stops the recorder. This is equivalent to pressing the "Stop" button.
Ctrl + Alt + P - Pauses the recorder. This is equivalent to pressing the "Pause" button.
Ctrl + Alt + I - Toggles the Presenter Video option (if enabled in the movie).
Important: The Screen Recorder is in a beta testing phase. Some shortcuts may not be working on all systems or Windows versions.
Optionally provide private feedback to help us improve this article...
Thank you for your feedback!